We just received our first shipment from SOPHi nail polish. SOPHi’s website says their “nail polish contains no formaldehyde, toluene, phthalates, bisphenol A (BPA), or ethyl acetate.” How could it possibly hold up without some of those strengthening chemicals? I decided to investigate.
Starting With SOPHi
I have to admit, I was skeptical of SOPHi nail polish holding up like the product said it would but decided to give it a go anyway. The colors we ordered looked great and I hoped that the polish would hold up to how much I use my hands.
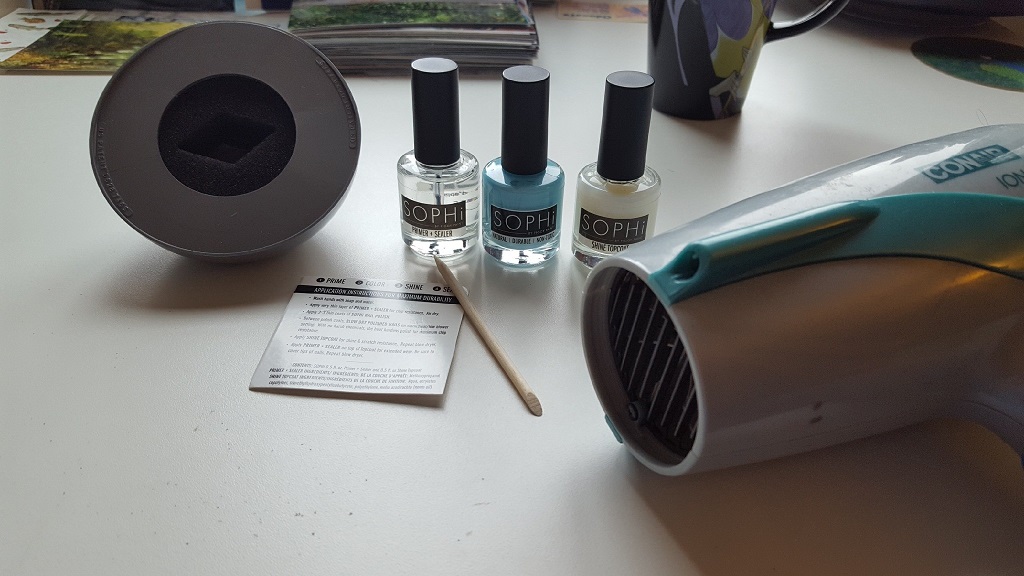
To get the most out of the product, SOPHi polish requires a bit of an investment. For the best results you have to get the polish, primer/sealer, and the shine topcoat. Then, if you want to get the polish off properly, you have to get some SOPHi polish remover and maybe even a set of wood cuticle pushers.
You absolutely can NOT take SOPHi nail polish off with a regular remover; you have to use the remover designed for it. I did have some luck removing nail polish made by other brands with it. I don’t know if that is the case for all polish though.
The SOPHi Journey
Here’s my SOPHi journey: To start, I just tried the SOPHi polish out like I would normal polish. No steps to harden, just a bottom coat, 2 coats of polish and a top coat. It went on easy and covered well. Quick note—I really like the fact that SOPHi polish doesn’t have a strong, chemically smell. This first application lasted a few days but chipped just like normal polish would; no surprise there.
The next time I applied the polish I followed the hardening directions. The process took about 40 minutes, but I think it was really worth it. To get a hard coat that really stands up to the rigors of the retail world (here at Oswald’s, where I’m constantly using my hands), the directions say to apply 5 to 6 coats of polish.
My SOPHi Nail Polish Application Process
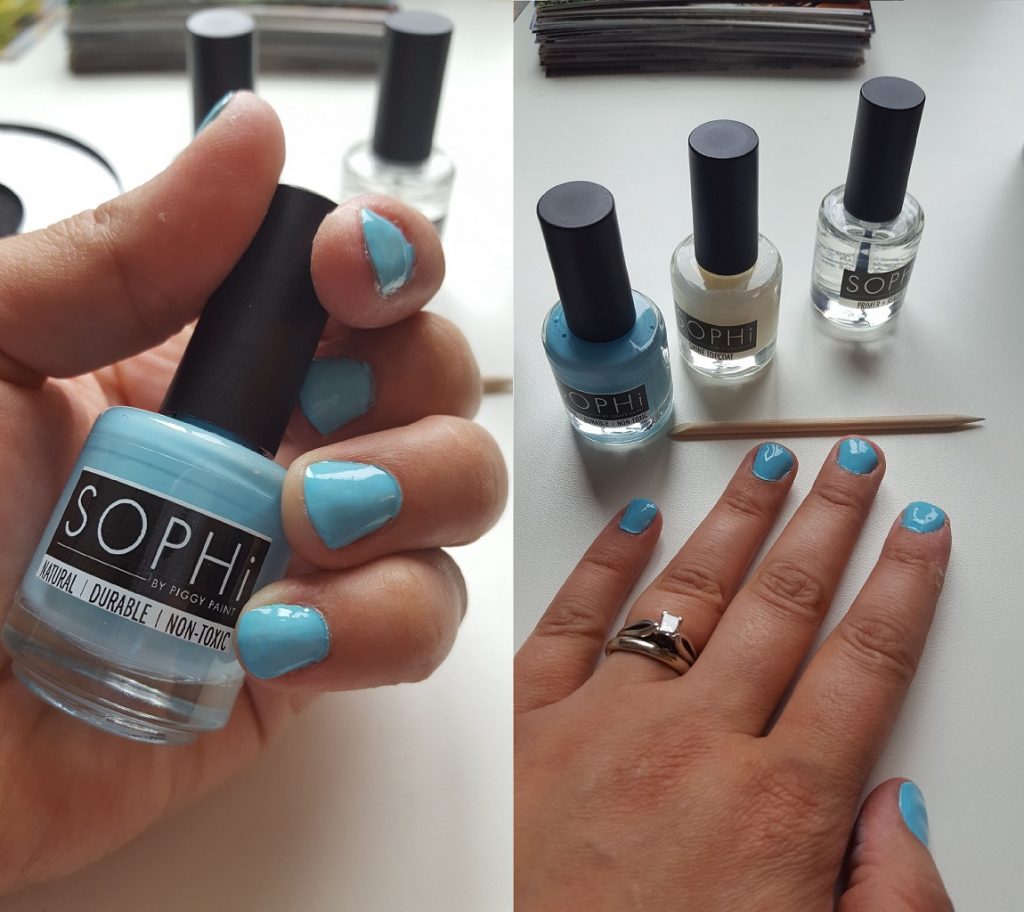
First, I put a thin coat of primer on. The great thing about SOPHi’s primer is that it really doesn’t feel like you have anything on at all. Next, you apply 2 to 3 coats of the polish. For my second SOPHi session, I chose the color Pretty Shore About You (a nice baby blue color).
After each coat of polish, you need to blow dry your nails on a low heat setting. It sounds like overkill, but the blow drying actually worked out well for me. I have a hard time sitting and waiting for polish to dry. Most of the time I mess up nail polish cause I get bored waiting around. The blow drying not only dries but it gave me a little something to do so I didn’t mess my nails up.
After the nail color application comes the Shine Topcoat. The Shine Topcoat is super forgiving with any imperfections left from previous coats. It really covers all the brush marks that you might have left behind. A bit of blow drying, then one more coat of primer and a final blow dry. Perfect. This polish job holds up really well; I got a full week out of it!
The Learning Curve
SOPHi polish does have a downside: Taking it off has a bit of a learning curve. The remover is a bit gel-like and pumps out of a bottle. SOPHi says all you need is a paper towel to wipe old polish off. I quickly found out that this really wasn’t the case. I had to use a cuticle tool to push the nail polish off.
Here’s what worked best for me; I pumped one squirt on my nail then I used the tool to spread it over my whole nail. I let it sit for a minute or two then I just pushed the polish off my nail with the tool on top of the paper towel. It worked really well when I started using the tool and paper towel, but there were a few nails that I had to reapply the remover. I think the removal process will take some time to really get down.
Overall, I really do love the polish, even though the removal is a little more involved than I would like. The fact that there isn’t a lot of odor and the durability is great outweighs the tedious removal process. I’ll keep you guys posted if I learn any new tricks. Highly recommended!
– Al